
Hefeweizen brewday (28)
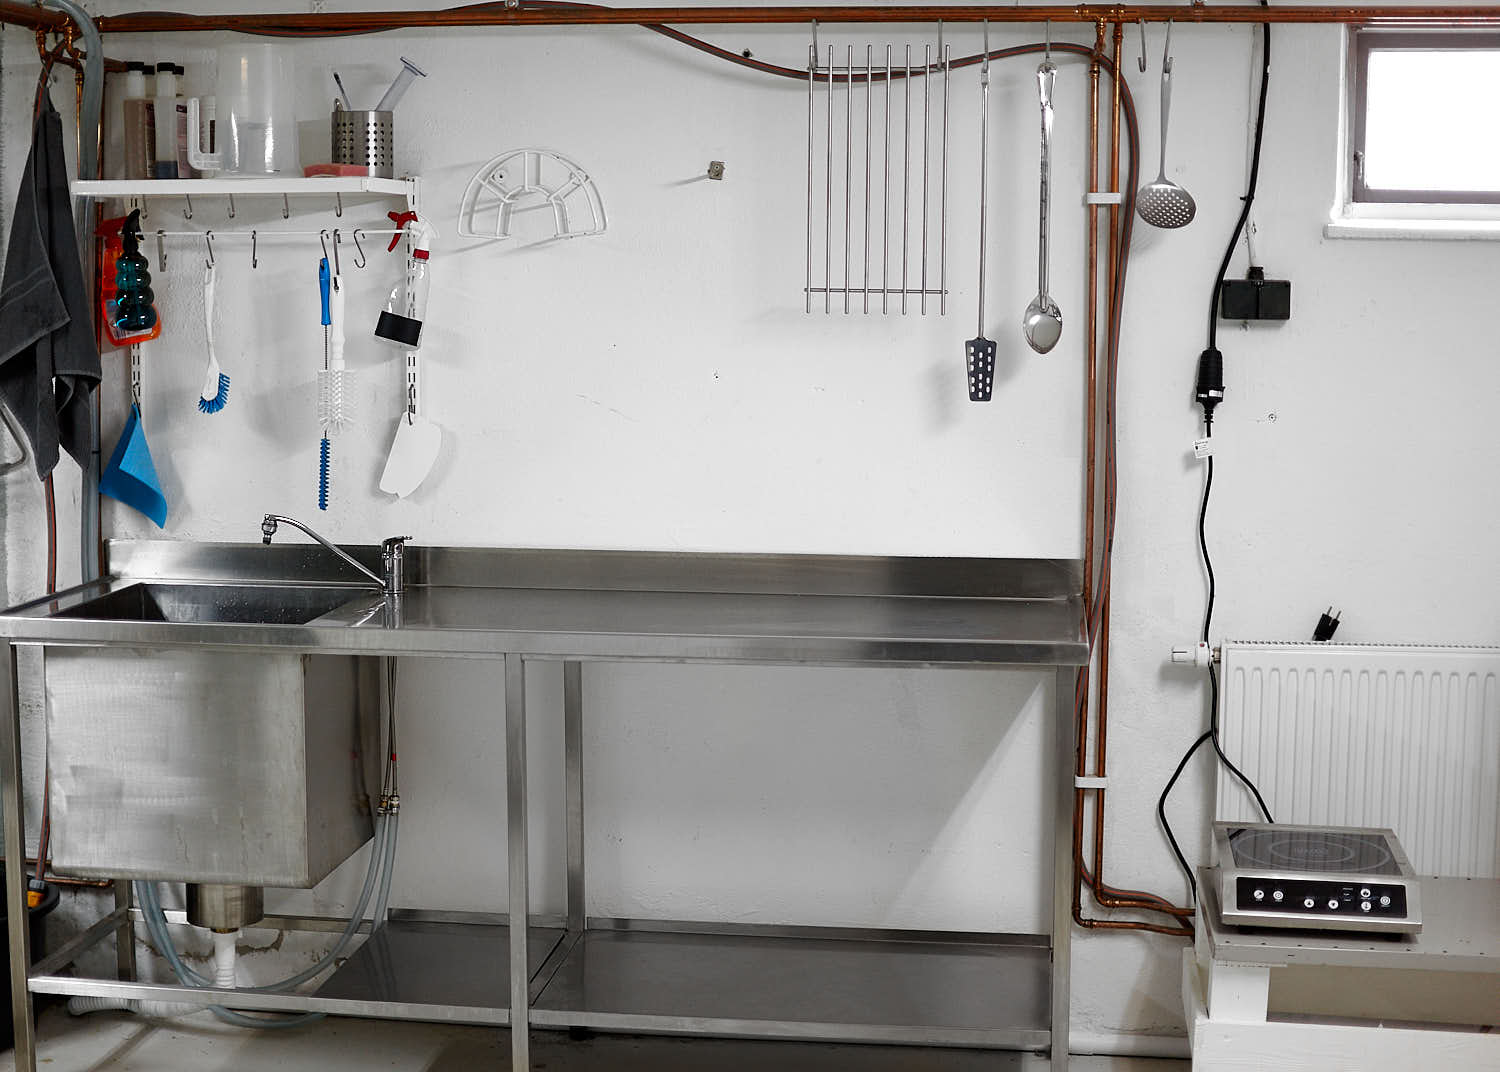
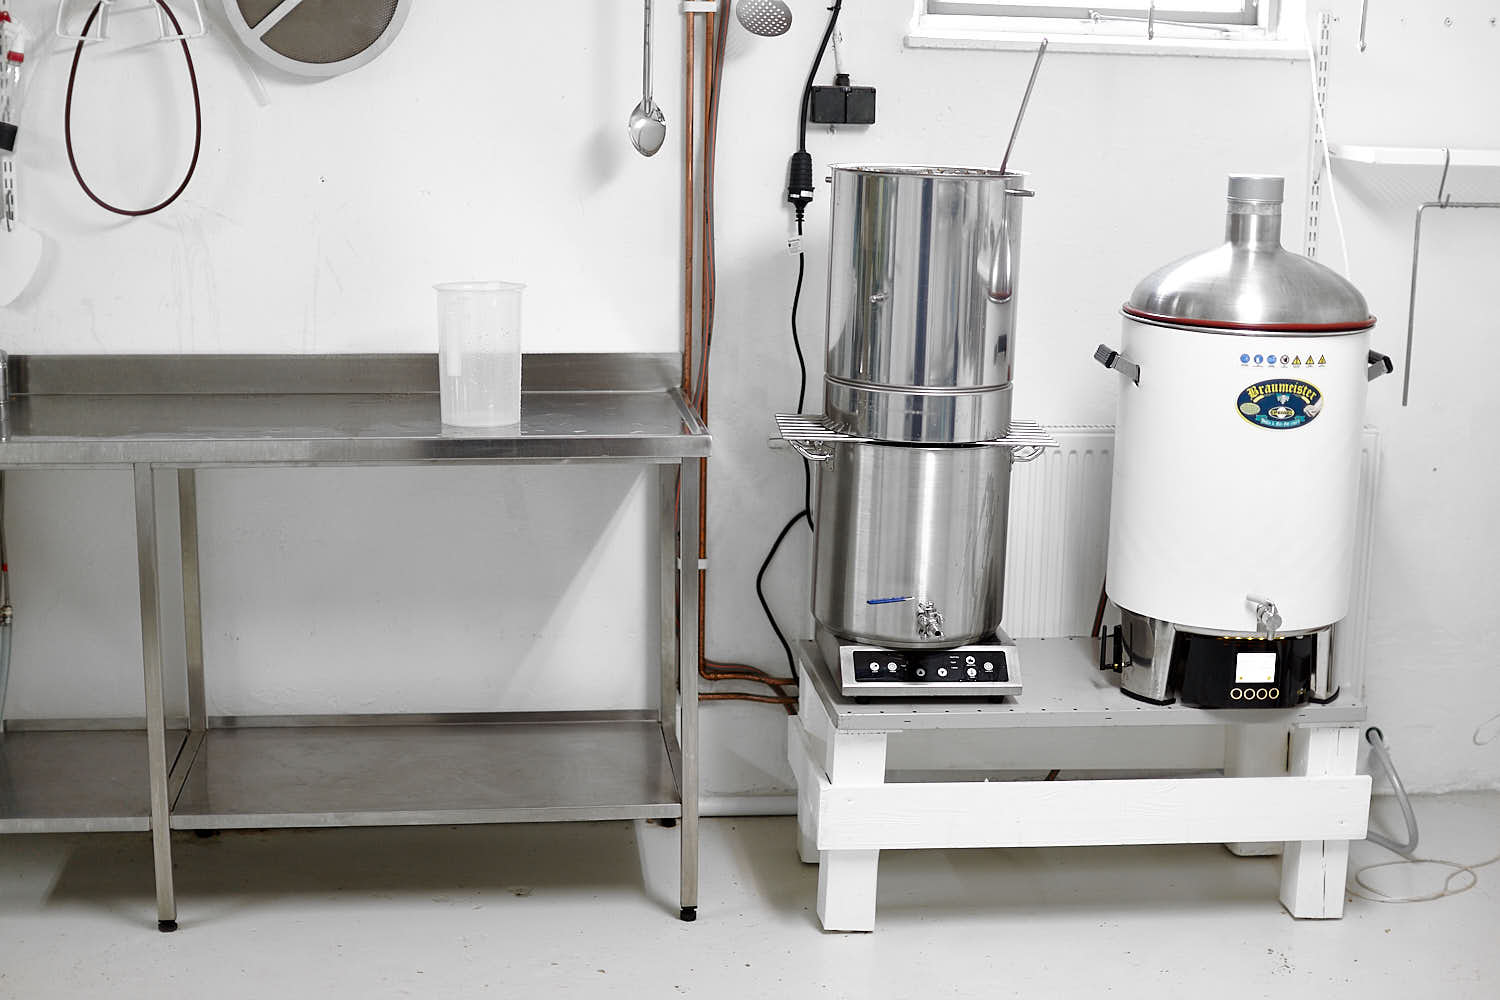
 This brewsession actually started a few days in advance. First I took some time to remove all brewing gear that I don’t use during a normal brewday any more, clean out the clutter. Less is more and it’s a lot easier to keep everything clean and tidy when there’s less stuff everywhere (not that I have a very messy brewery but still). I also removed everything that I kept under my sink. It’s not a place for storage nor for cleaning equipment, it’s a work bench and not a shelf. In my ideal brewery, newly cleaned (and also still wet) equipment can dry in their dedicated storage space so I don’t need to move everything twice. I’m slowly getting there by adding more hooks one the wall and a place to hang hoses. I also made a temporary installation of a water hose in the cieling for the cooling mantle and immersion chiller so I don’t have to install/connect one twice per brewday and have it on top of my workbench. This might seem a bit silly but all these small improvements makes for an easier brewday with less boring tasks. Two days before the brewday I made a starter of about 1,5l with Weihenstephan W68 (WY3068) yeast. When talking directly to a guy with deep knowledge of Weihenstephans brew methods he advised against underpitching hefeweizen in a homebrew environment but I know what a massive kreusen the W68 can create so I didn’t dare to make a bigger one. Less yeast means more esters (mmm that banana isoamylacetate) but it can give you problems like sulfur and low attenuation. With hefe starters, let’s just say I do slight an underpitch and still sleep well at night. I have also made the decision to always (from now on) buy this yeast fresh for every brew. I’ve tried so many times to harvest the yeast by skimming the kreusen but I don’t get predictable results from it and I actually stalled one fermentation once. To keep a healthy culture going you need to brew with it often or keep feeding it and I only have the energy to keep one big culture alive that way…
PH of a Weißbier
Hefeweizens benefit from a higher initial pH because the ferulic acid is more active over pH 5,7 than my usual pH range of 5,3-5,4 so I waited to add the lactic acid until the beginning of the beta amyalse rest. Having tried two bottles already I can tell you the clove and black pepper like nuances are very pronounced, almost too much! This might even out in a few weeks when the flavours mellow and come together more but right now I’m thinking of lowering that mash rest by 10 min. I know that Kai @Braukaiser did an opposite conclusion of the ferulic acid rest but his experiment might have been flawed by the stuck fermentation and very low primary fermentation temperature. I wish I could spend my whole days in a lab testing these things out for real but for now I have to rely on batch-to-batch testing and I’m too lazy to have a double brew setup to do side by side tests. I want to brew beer, not just experiment every time.
No photos and no haze
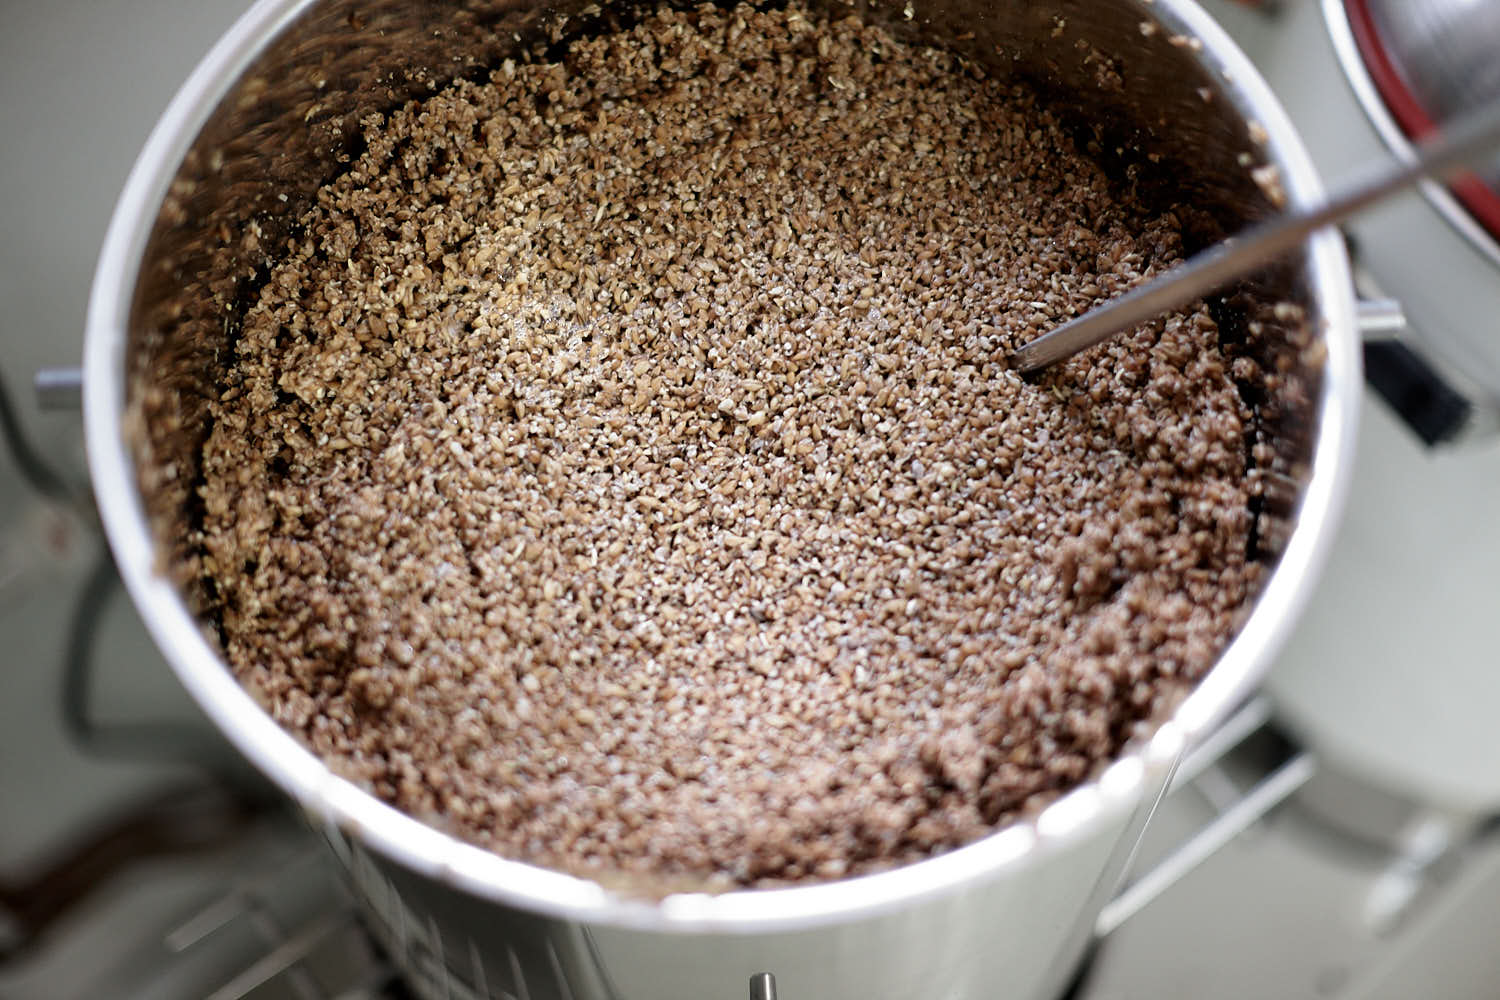
Those who have been following me for a while will notice that the photo documentation starts in the middle of the brew day this time. That’s because I didn’t have my camera available and also spent part of the morning with my daughter in her new kindergarten. Nothing new or particularly visual happened during the crush, preboil or mash in so we can skip right to the mash out. This being a weißbier/Hefeweizen my grain bill is always minimum 50% wheat (sometimes up to 60%). That amount of wheat combined with a protein rest at 55°C would give me hazy wort according to my latest experiments but it went the other way. The wort at mash out was crystal clear so blaming wheat for your hazy beer might not be totally accurate!
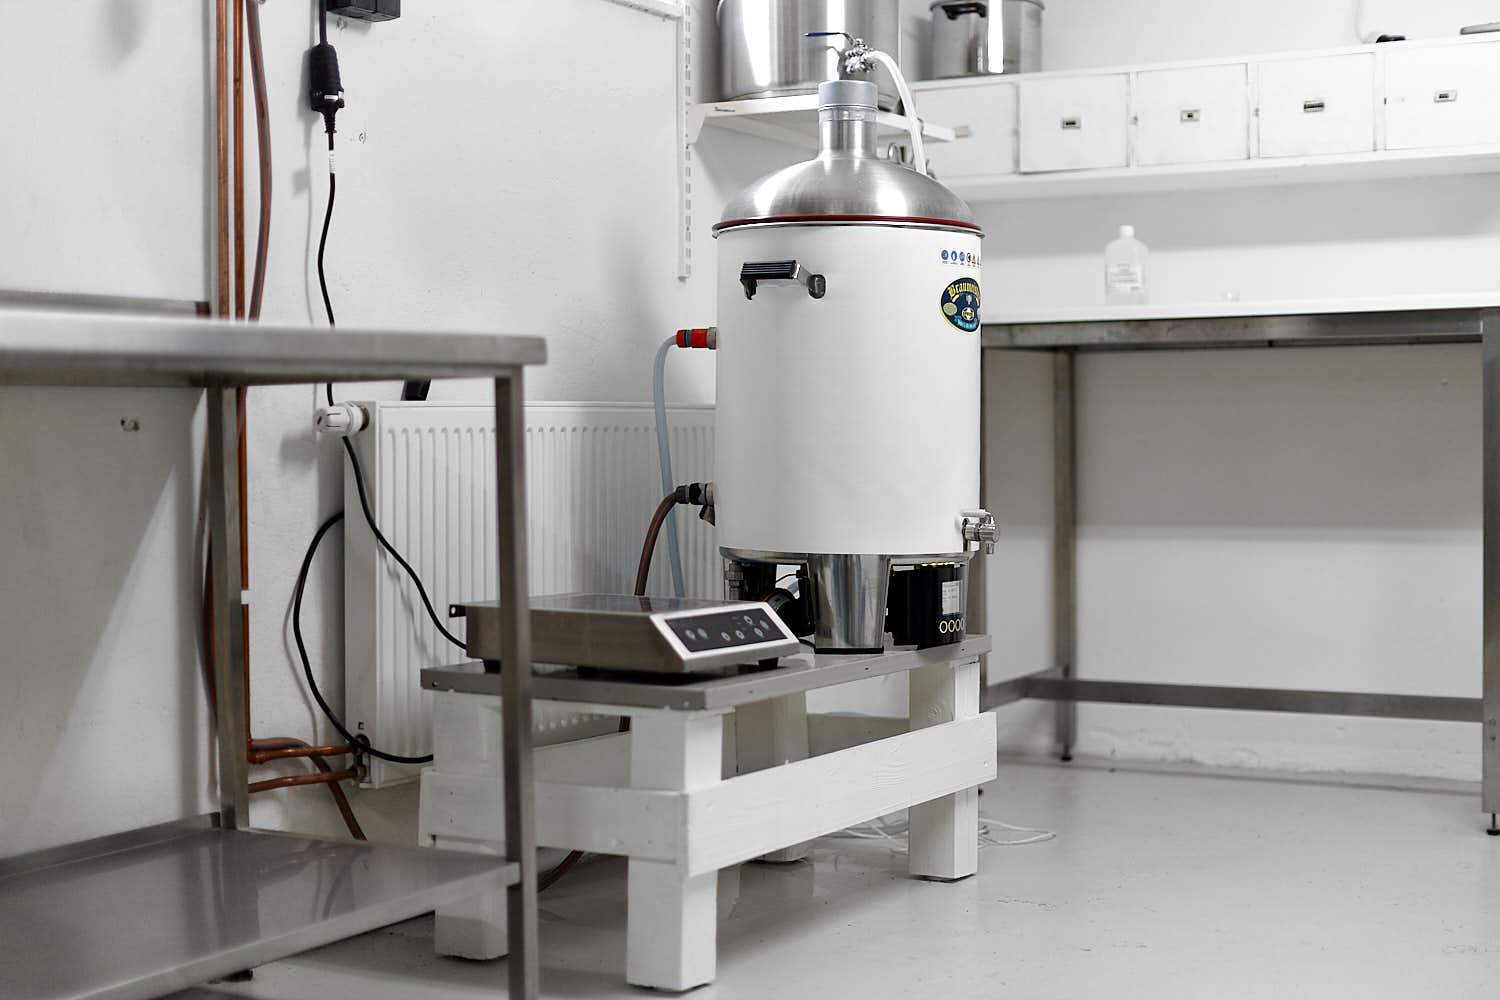
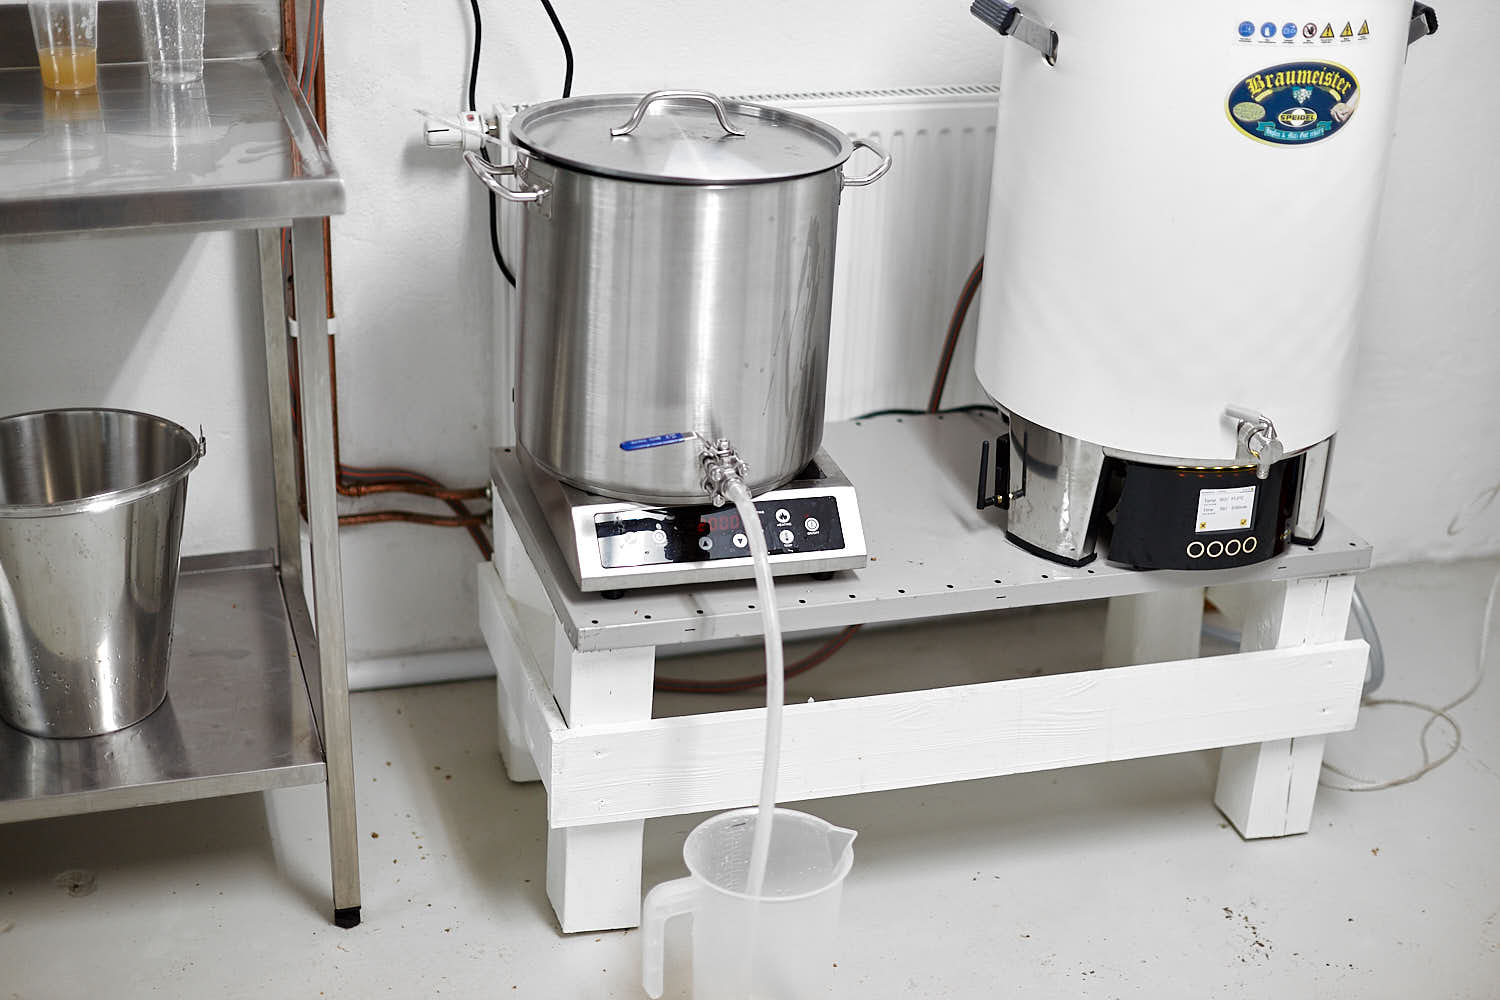
My Braumeister decoction workaround method
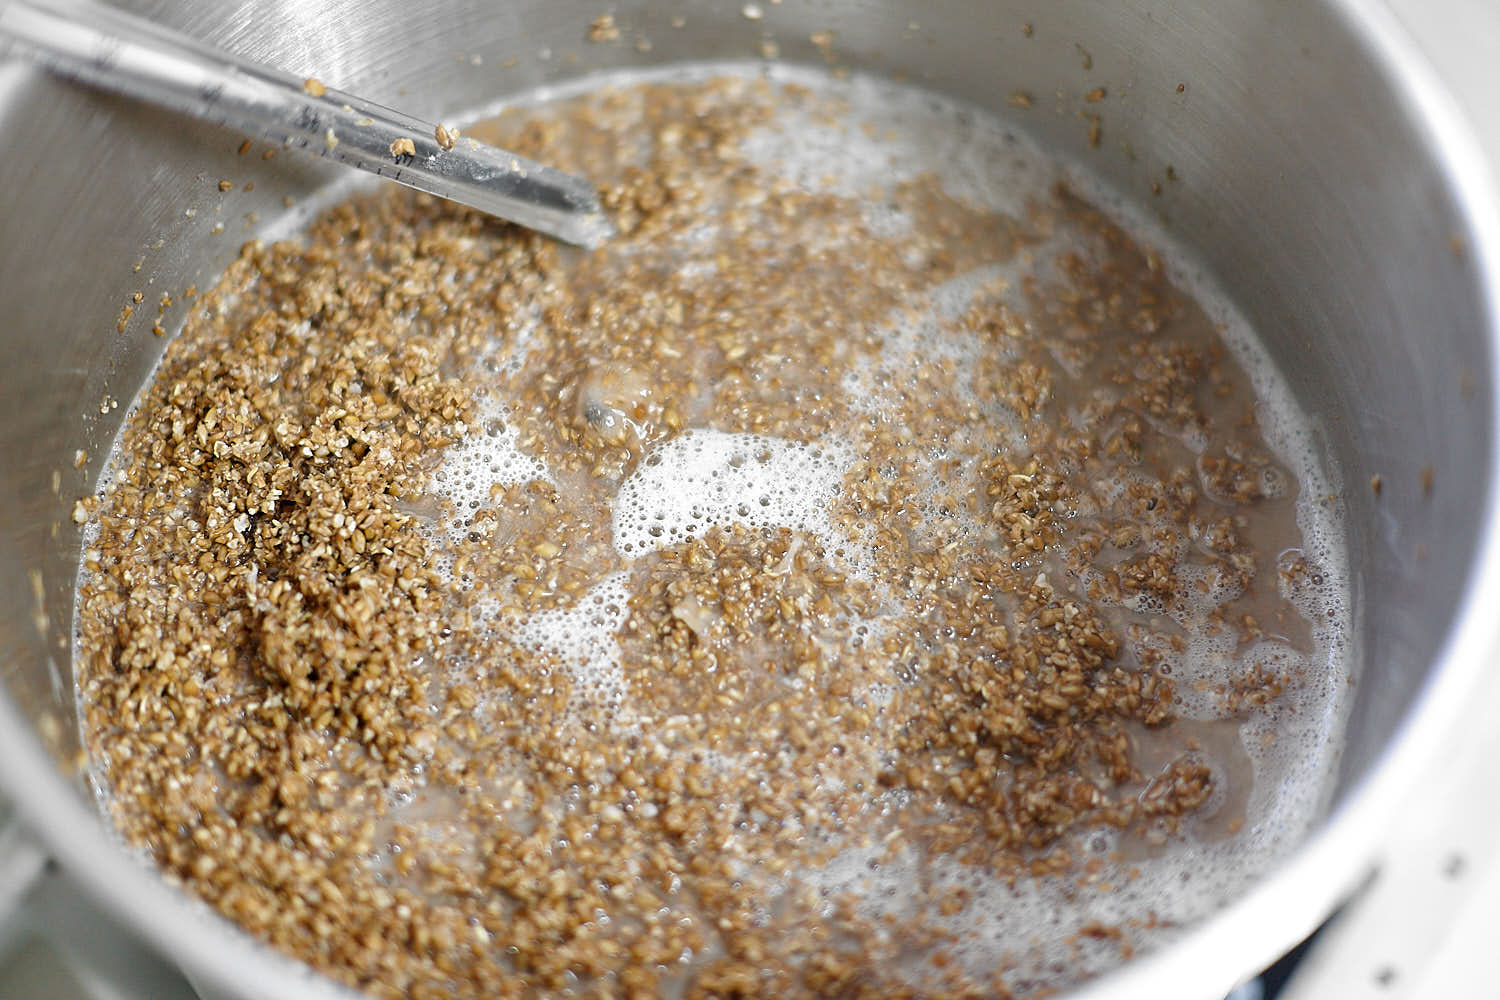
Many of my favorite breweries still decoct their beers and while it is not at all recommended for low oxygen brewing, it is even more hard with the Braumeister when the malt pipe is over flown with water/wort. So I did a little thinking and came up with a solution. Most decoctions is taken early in the mash program and historically used to raise the temperature in a controlled way in times when they had no tools to measure temperature. Using one third of the thick mash, boiling it and then return it would always give a X amount of raised temperature since the boiling temperature is fairly constant. But on the way to the boil, many decocters (my own invented word; “Decocter”, a man who decocts) will first rest at beta/alfa-temperatures for starch to convert to sugar. That’s kind of the same thing as letting the mash go thru a full mash program and then boil it (but with less wort). So this is the method that I used; After I lifted the malt pipe and let it drain for 10 minutes, I transfered most of the spent grains to a new boil kettle with a lauter helix in it for my “Braumeister decoction workaround method”. I added a few liters of water for a “sparge”, hoping that the pH would still be within reasonable levels, and began boiling the thick mixture on low heat (1200 watts). I only stirred a few times during the 45 min boil but still there wasn’t any scorching. After the boil I recirculated the boiled wort for a while but it didn’t get much clearer to I gave up and collected the 4 litres and added it straight to the Braumeister that was boiling since half an hour. The hazy wort could have come from the boiling or the short malt bed that didn’t work properly as a filter, that I don’t know (and for a hefe I don’t really care either). Yes the amount of oxygen that got into the mash from transfer, stirring and boiling the decoction would destroy the LoDO-flavours of that part of the wort but I still had those flavours in the wort in the Braumeister. And since I boiled the decoction and transfered almost boiling decocted wort into an already boiling wort I don’t think I added enough oxygen to flaw the “main wort”. Anyhow, I did take a sample before and after the decoction to smell and taste what a 45 min boil would do and surprisingly there was only a small nuance difference. The decoct sample had a smoother and softer mouthfeel (kind of wheat flour-ish), some Munich malt flavours and sweeter. The non decoct sample had a more grainy, raw, green and fresher tone, almost a bit “watery” in comparison. They both had the same SG so no conversion took place in the kettle. The decocted sample was a little bit darker (see photos below).
My conclusion; I was surprised that there wasn’t a bigger difference in taste. I don’t see how this little amount of decocted wort would make a big or even noticeable difference to the main batch so even if the decoction was a success, I think I would have to “filter” my whole wort through the decocted mash to get more flavour out of it and that would not be possible with regards to low oxygen brewing. It was still a fun method to try out but I don’t think it was worth it and I will probably not explore this any further unless any of you guys out there try it and get different results than me.
Wheat = more cleaning?
Since I upgraded to the plus version of the Braumeister (new controller unit and cooling jacket) I have had a very easy time cleaning the insides and heat coils after a brew day but not this time. The coils have residues on them and the kettle inside need more action than my CIP ball can deliver with PBW. I’m not too fond of using NaOH for cleaning because of the danger of chemical burn on skin (and potential blindness) and it is also bad for the pumps but it gets the job done. My theory of what caused the extra junk was the wheat and/or protein rest.
The Braumeister boil
One new feature of the latest controller version for the Braumeister is the warning signal to remove the lid when the temperature is approaching 100°C. I just wish it could be louder so I can hear it from another room in the house or that it could send a warning to my phone via myspeidel.com or the wifi app interface. One other software related problem is that the count down of the latest firmware begins way later than I think the boil begins. This time I actually timed it and I had a good rolling boil nearly ten minutes before the 60 min countdown began. I’ve actually changed my boil time in the mash program to 50 min instead of 60 min because of this. Not a big deal but I can’t see the reason for it. The old controller began the count down a few minutes after passing the 98°C mark but this have obviously changed for some reason.
Bottle spunding
After many batches of hefes I’ve realised that this is one beverage that really benefits from being in a bottle and not a keg. I’m not very fond of bottling and switching to keg was a huge timesaver for me. But for a hefeweizen, the keg will begin to pour a very haze beer and after a few weeks it will almost pour a kristallweizen. One could shake the keg every now and then but that will not give a controllable mount of yeast in the glass. That’s why I’ve started bottling my hefes and also started bottle spunding, which means that I will bottle the beer with remaining extract left to ferment. I have brewed hefeweizen so many times that I know what the final gravity will be approxemently which is a must since a fast ferment test will not work very well because of the similar temperatures. If you’re not careful, you might end up with bottle bombs so use this method only if you are VERY confident about your presumed final gravity and sanitation! I want a pretty high carbonation level of this beer style and I’m aiming for 3,5-4,0 volumes of CO2. Every SG point gives you roughly 0,51 vol CO2 and my FG is always between 1.010 to 1.012. That made me wait until my gravity reached 1.018 before transfering to bottles and I have sneaked a few samples already and they taste very nice. It might not beat a fresh Weihenstephan enjoyed in their beirgarten in Freising (been there three times) but it sure tastes better then the bottles I can buy here in Sweden. I love to travel, but beer doesn’t and it should always be enjoyed locally is my philosophy.
 The water hose for the chiller(s) is just twirled around some pipes for now but I might do a proper installation in the near future.
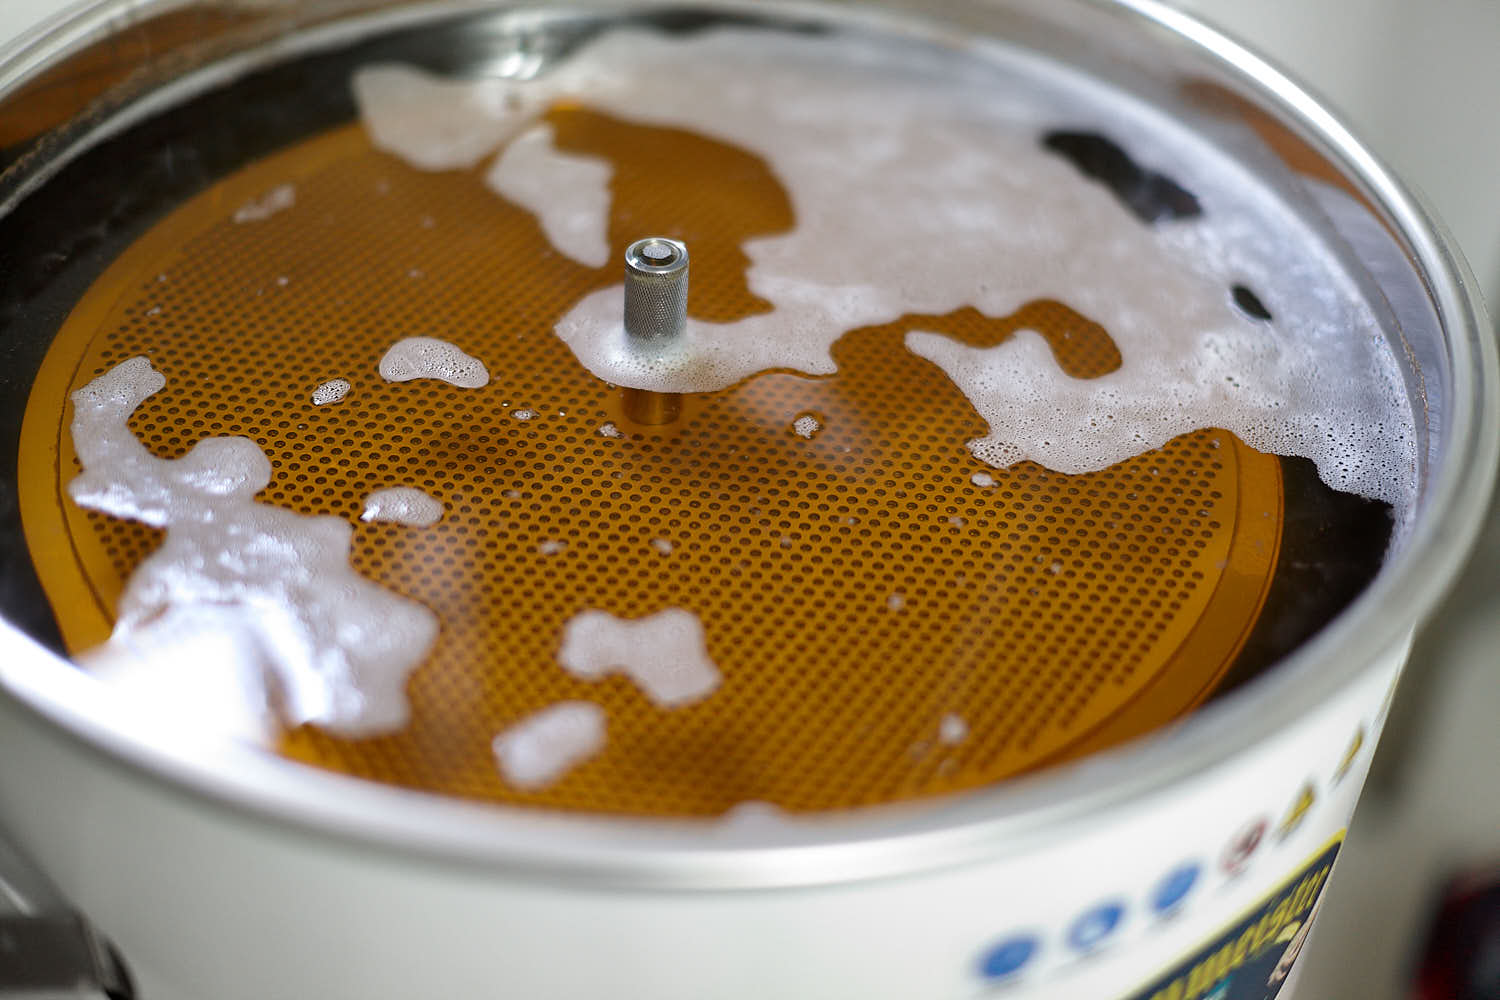 This clarity is unheard of in a wheat beer! The level of foam here is OK but not much more. I will keep on struggling for zero foam but I’m not willing to loose 3-4 SG points just yet.
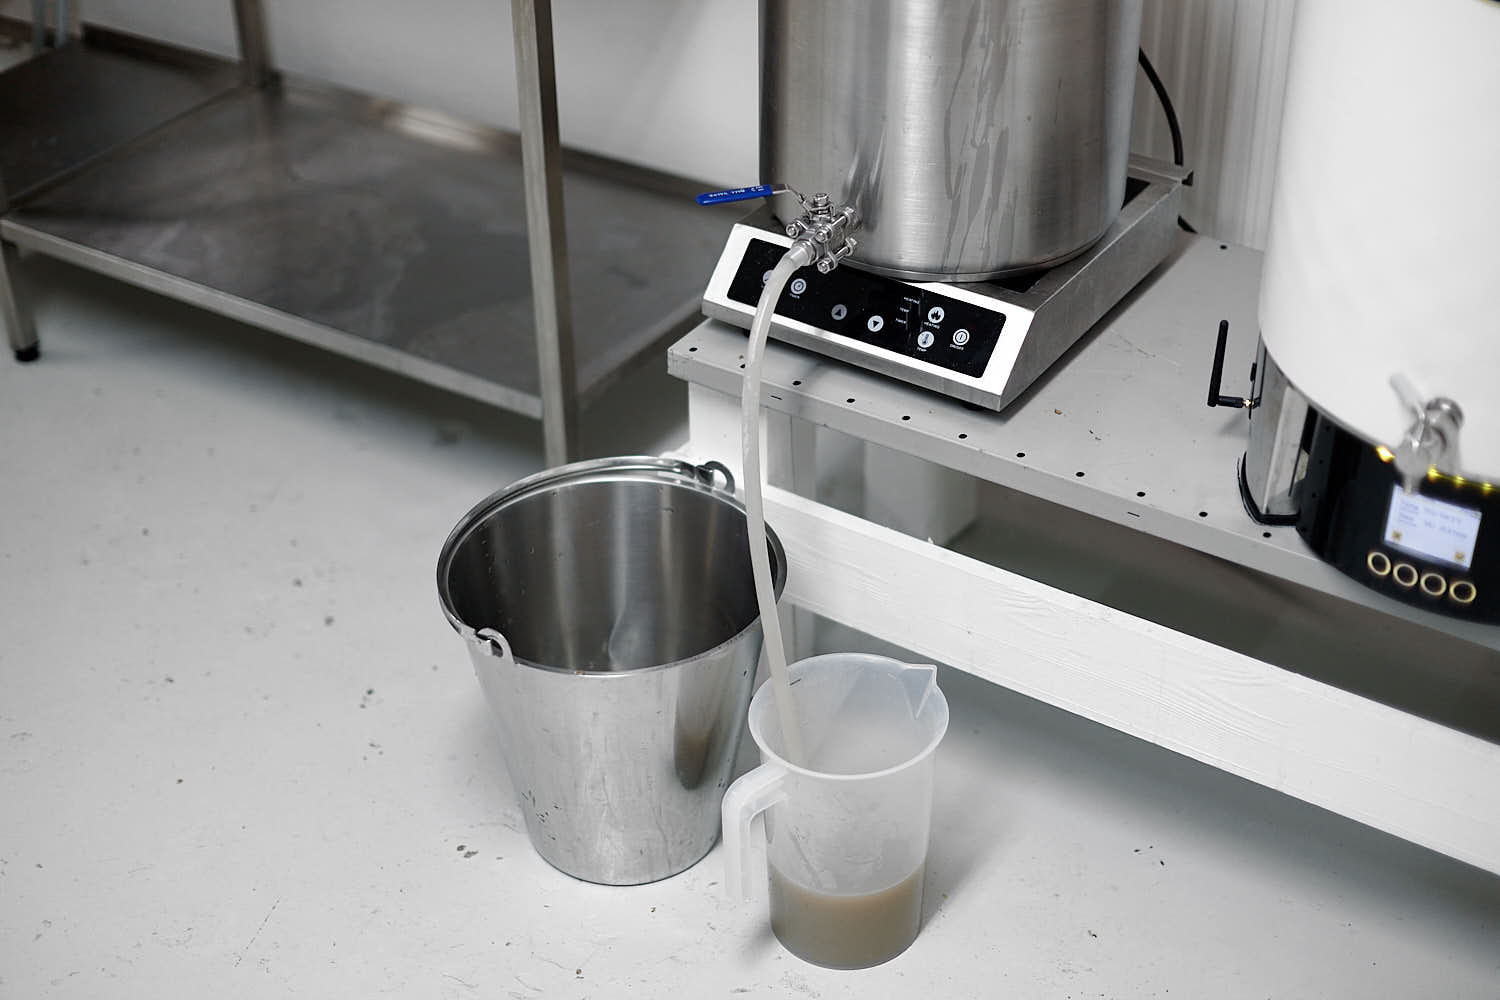
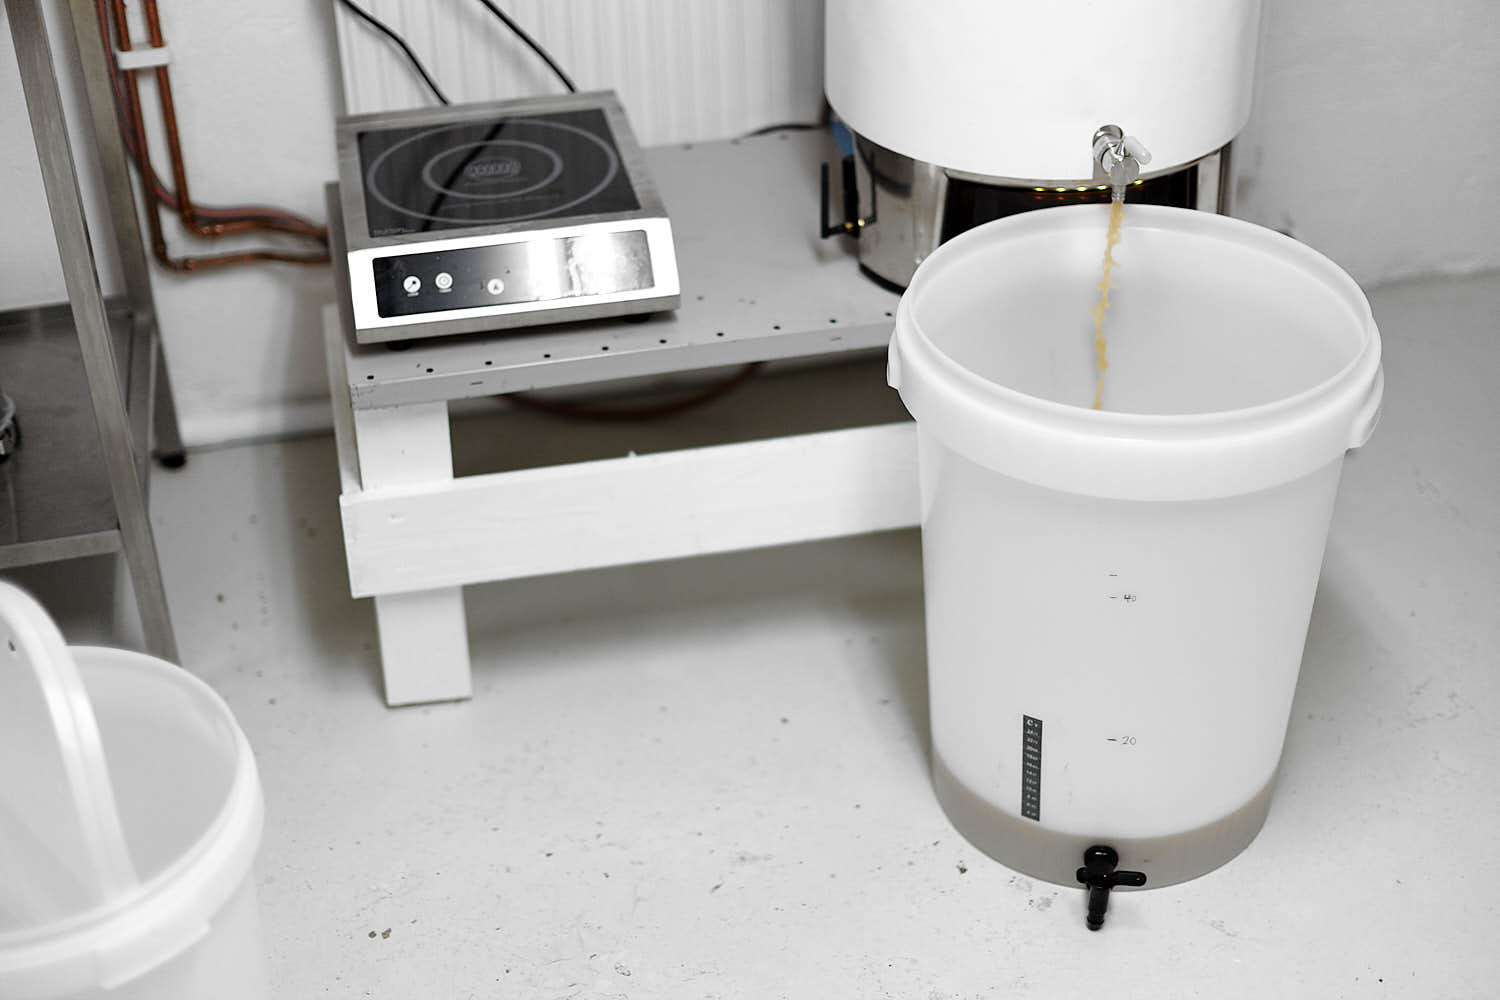
 Final draining and some light sparging of the malt pipe into my 36l kettle.
 The beginning of the decoction.
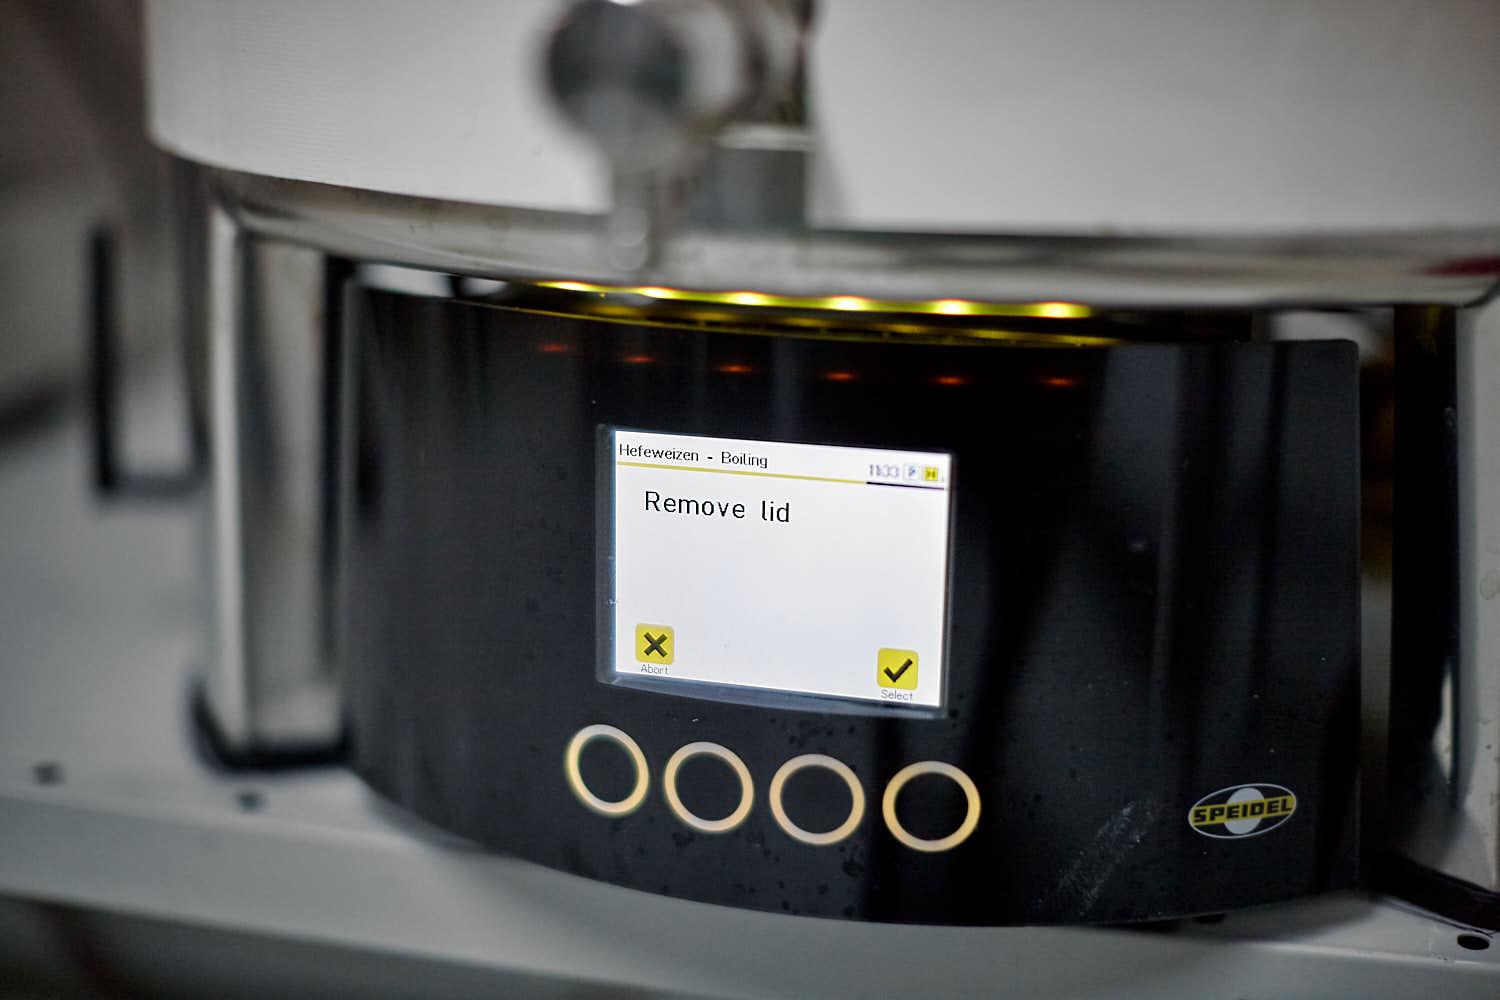 The ”Remove lid function” that I really like but would prefer to have a louder volume of.
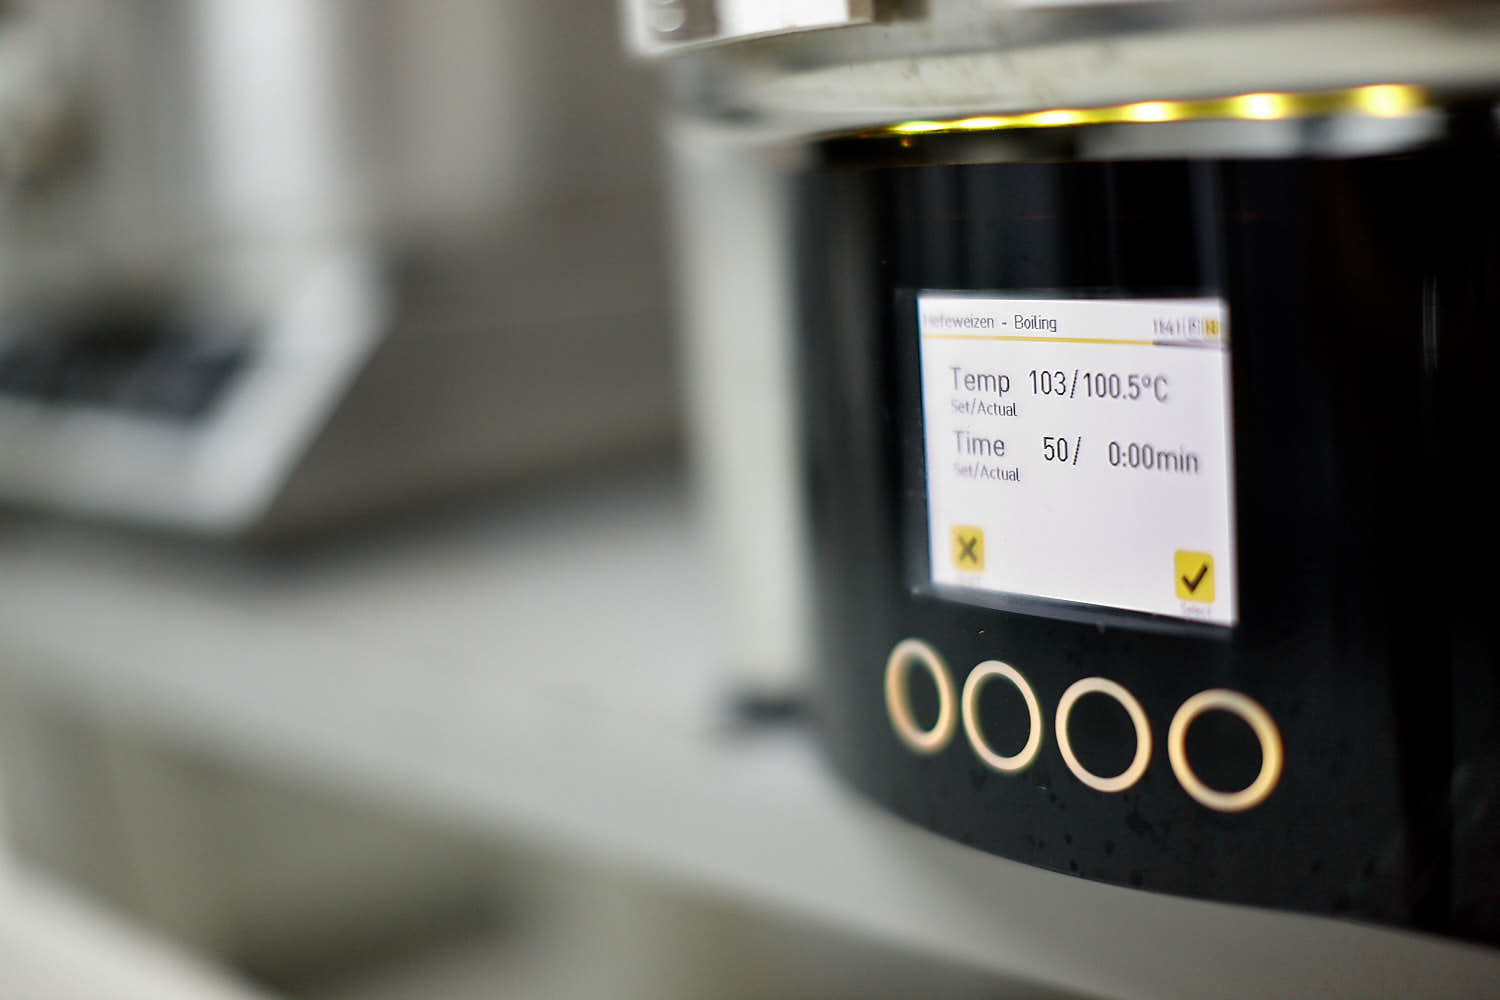 The countdown begins in 10, 9, 8… Minutes that is.
 Doing the vorlauf (recirculing).
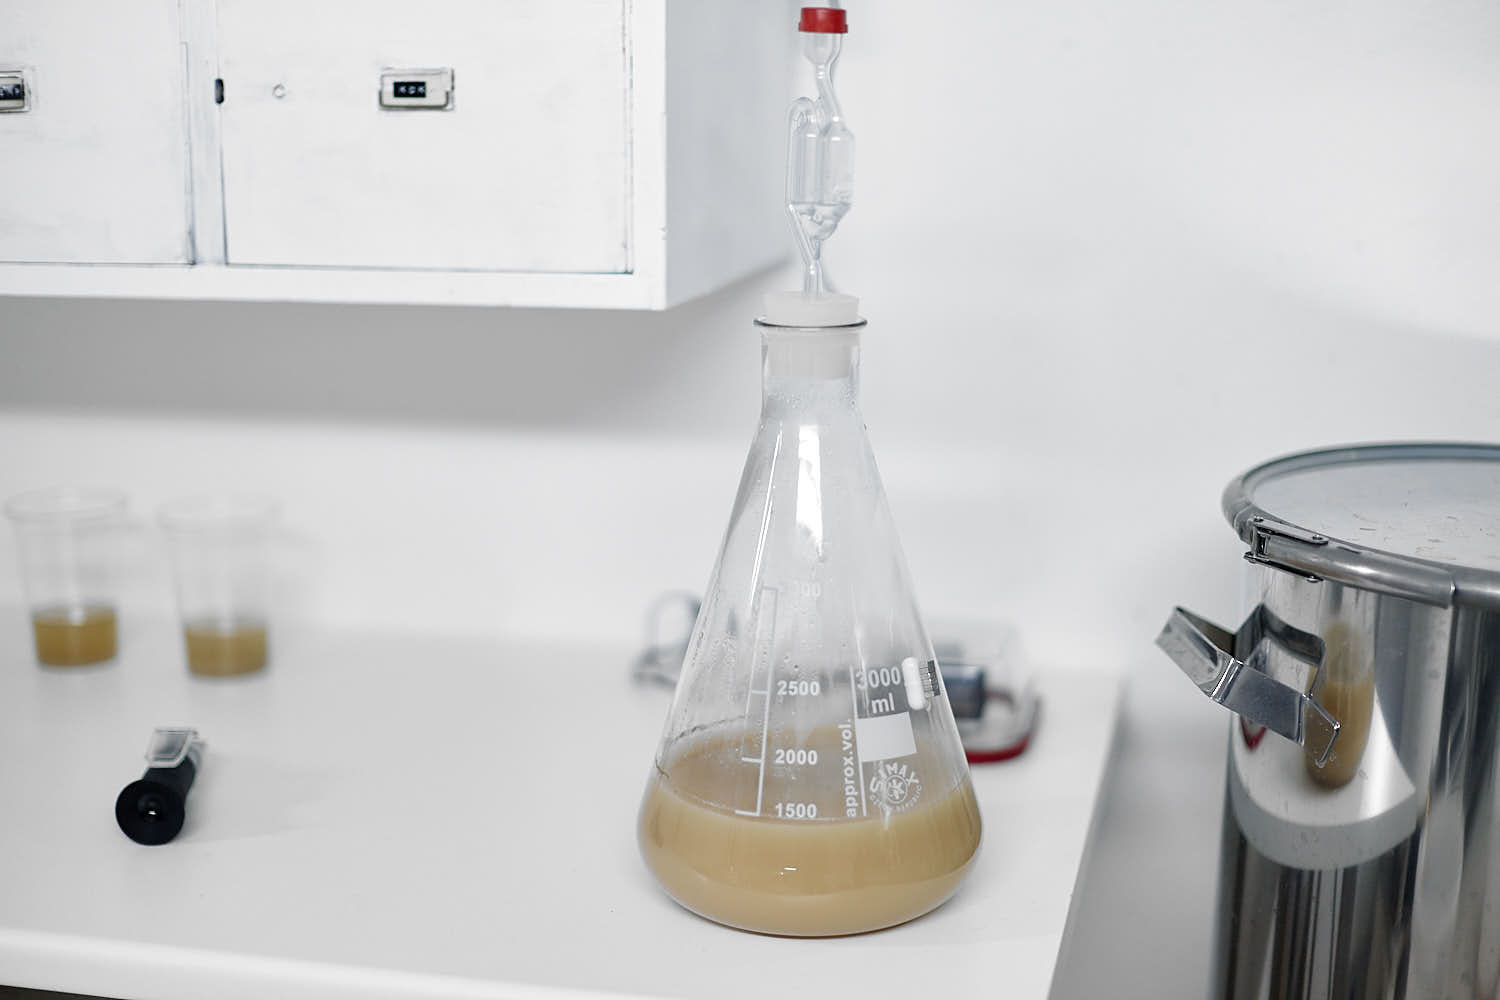
 The before and after of the decoction. The left one is the before sample and the brightness difference you see here is about how much I saw with a naked eye. The sedimentation of the left sample is due to the 45m longer wait time before this photo was taken.
 Yeast culture that have been standing on a stirr plate for two days.
 The w68 makes a huge kreusen so I ended up splitting the batch into two buckets just in case…
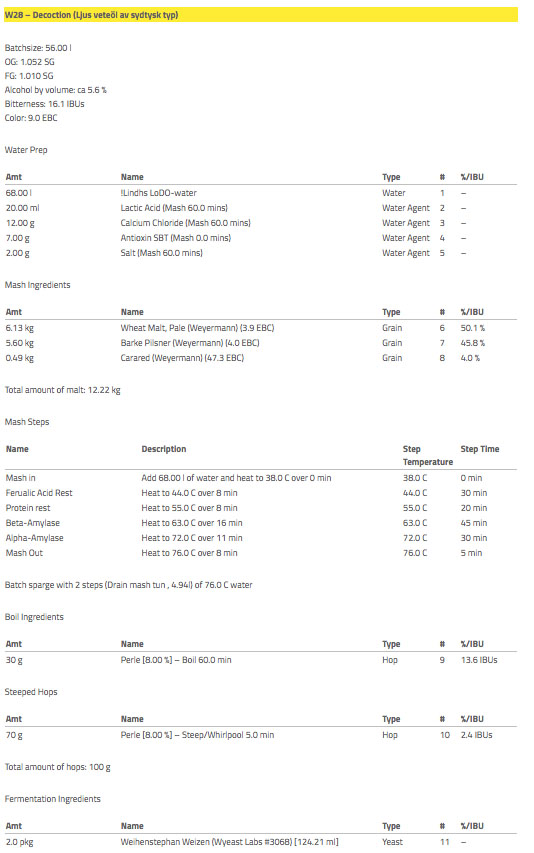 (had to make the recipe a screenshot since it started messing with the sites width).
 Gillar du Lindh Craft Beer? Vill du hjälpa till att hålla site:en vid liv och se fler inlägg?
Då kan du skicka en donation via Swish på Swishnummer 0700 827038.
Pengarna går oavkortat till brygg- och bloggrelaterade utgifter och inget bidrag är för stort eller för litet. Tack!
Gillar du Lindh Craft Beer? Vill du hjälpa till att hålla site:en vid liv och se fler inlägg?
Då kan du skicka en donation via Swish på Swishnummer 0700 827038.
Pengarna går oavkortat till brygg- och bloggrelaterade utgifter och inget bidrag är för stort eller för litet. Tack!
 Du har väl inte missat min bok om ölbryggning? Köp den hos Humlegården!

Med tanke på dina lågsyreambitioner, som jag är nyfiken på: Hur gör du när du höjer maltröret och låter vörten rinna av? Då droppar det, vilket rimligen syresätter vörten en hel del. Låter du botten på maltröret vara under ytan? Och när man sen skall lyfta av maltröret så kommer det ändå att droppa, även om det är under en kort tid om man är snabb, väl? Har du någon lösning för detta? (Och så förlorar man lite vört antar jag eftersom allt inte kan rinna av om maltröret är under ytan?)
Jag höjer väldigt långsamt under ca 5 minuters tid. Det sista som rinner ut samlar jag ibland för att stoppa i frysen. Maltröret är Braumeisterns stora svaghet tyvärr men något färdigt bryggverk för lågsyre finns inte utan man får bygga själv i så fall.
Ok. Det känns som att en vinsch är ett måste i så fall …
Ja verkligen. Annars skulle jag inte ens försöka utan strunta helt i LoDO för det är 100% ogjort arbete.
Kul att få följa med din ölbryggarresa som vanligt, fina bilder och intressanta utforskningar!
Brukar du köra whirlpool med nya braumeistern? Den har ju kyljacka och inget som är i vägen vid cirkulering, så man borde kunna få ner kyltid avsevärt och dessutom lämna allt bös i mitten – eller? 🙂 Uppnås annars endast med plattvärmeväxlare, dyrt och krångligt. Funderar på att skaffa en braumeister+ själv!
Nej whirlpool brukar inte funka så bra med värmelementen. Inte för mig iallafall.